ONDULINE Roofing Sheet Installation
Let's learn how to make the perfect roof using our Onduline roofing sheets.
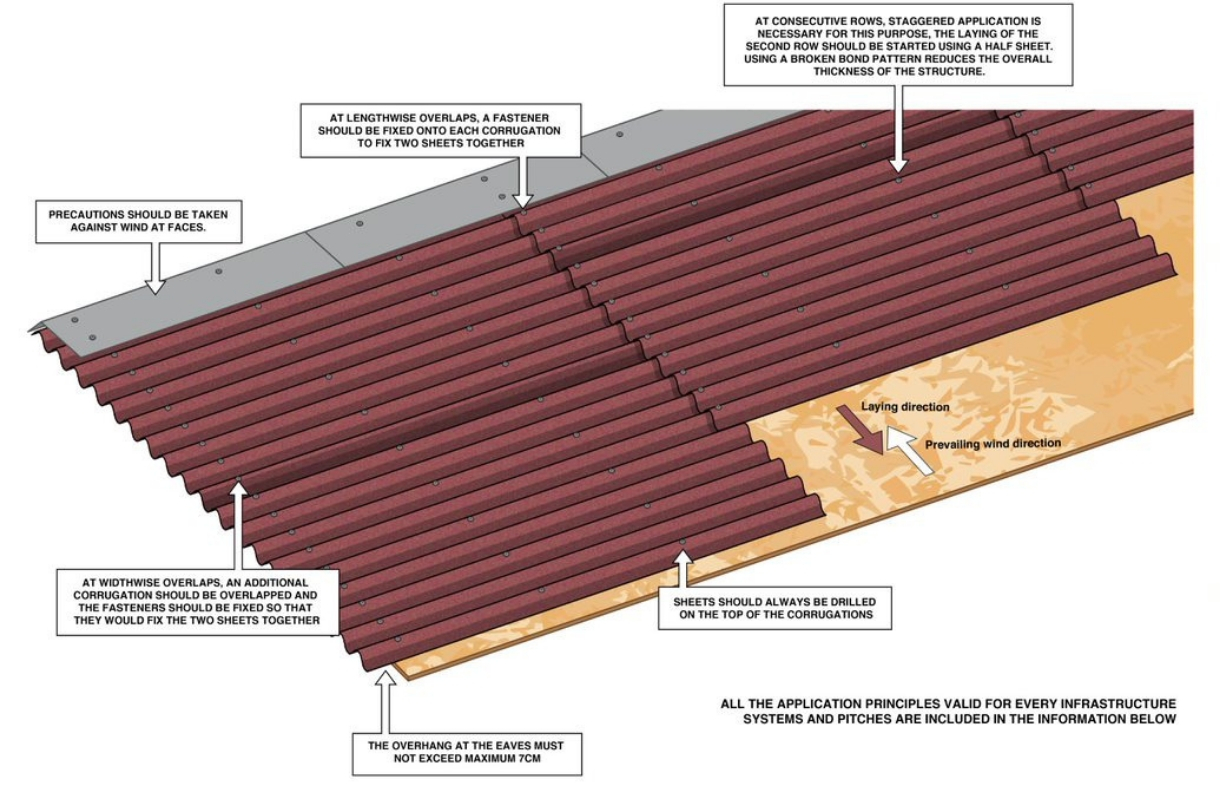
PURLINS
Minimum recommended roof pitches for Onduline roofing sheets are 15°. Onduline sheet shall be supported by purlins with maximum width distance of 45 cm.
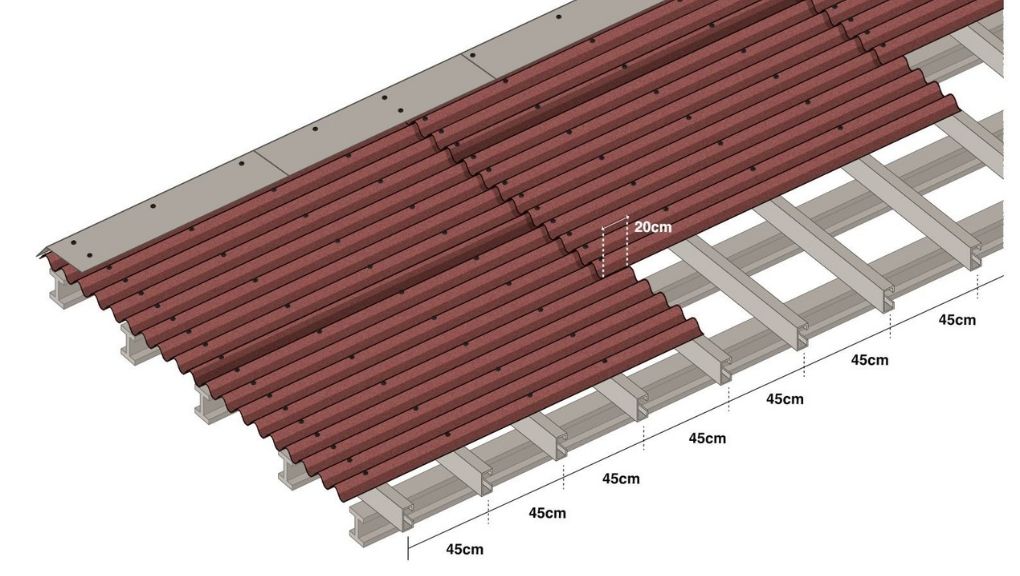
FIXING
18 screws should be drilled per sheet.
• 9 screws at each corrugation at the end overlap or eaves.
• 3 screws at first intermediate purlin of the sheet.
• 3 screws at second intermediate purlin of the sheet.
• 3 screws at third intermediate purlin of the sheet.
• Screws should be drilled at each corrugation at the end
overlap and side overlap.
To have a long lasting and guaranteed roof, it is mandatory to follow the nailing order and pattern
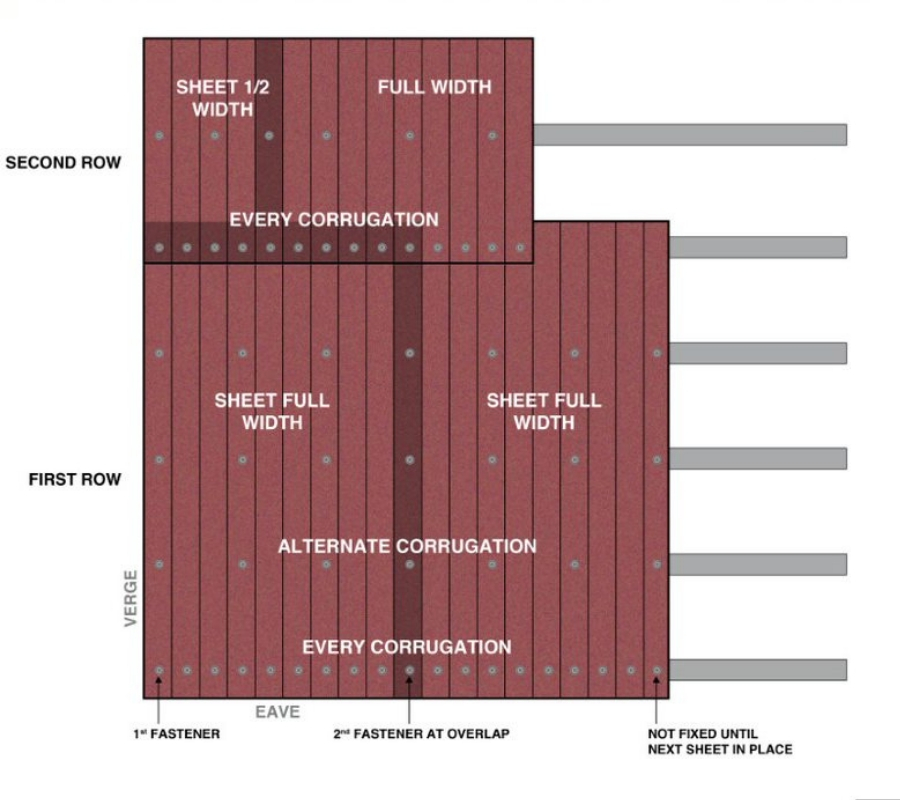
RIDGES
• Start fixing the ridge element opposite to the prevailing winds end, of the roof.
• The ridge element should overlap the Onduline sheet at minimum 14 cm.
• Lay ridge elements with a minimum overlap of 12.5 cm.
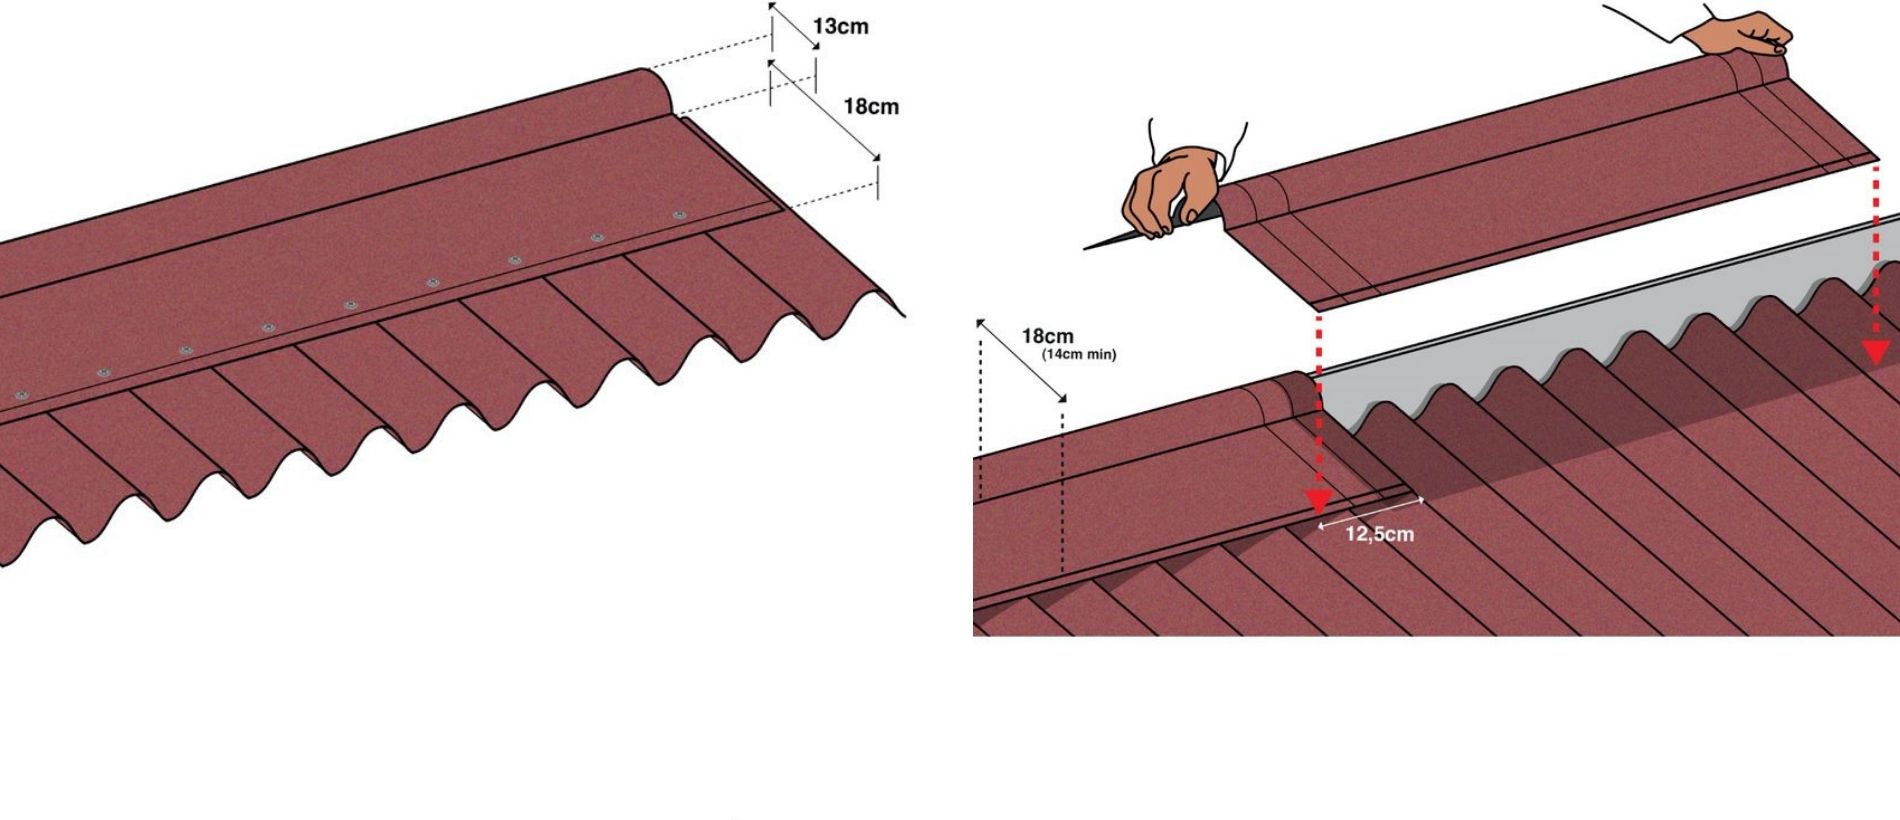
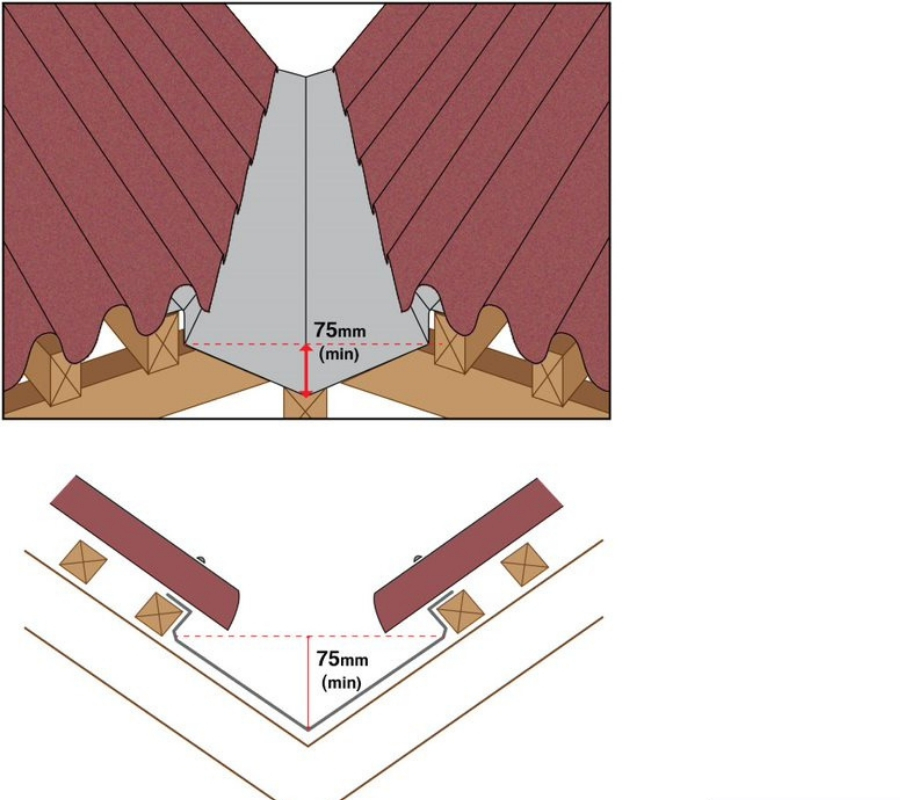
VALLEY
• Fix valley board / trim purlin and line with metal pre-formed unit.
• The vertical valley depth should be sufficient to allow the water to flow.
• You can use Onduline valley or a metal valley.
VERGES
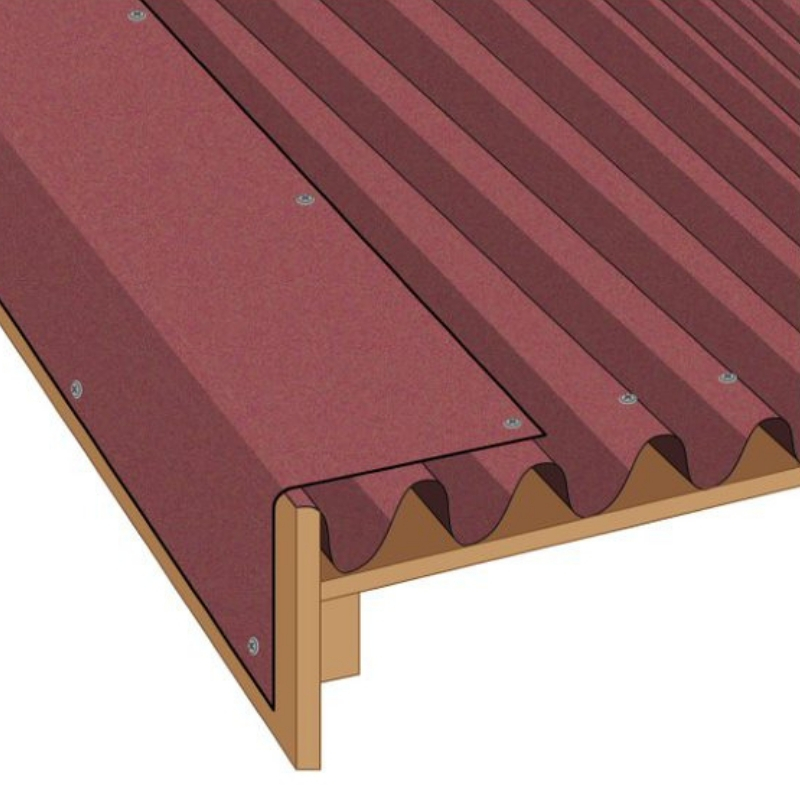
Optimize aesthetic, waterproofing, and wind uplift resistance by using a verge element. Fix it first into the sidewall, then on the top of the corrugation.
Maintain regularly your roof for a better durability: remove vegetation and leaf debris, take care of evacuations, accessories and structure, and maintain continuous ventilation.
For more detailed instructions, check out the video tutorial here