ONDUVILLA Roof Tiles Installation
LET'S LEARN HOW TO INSTALL ONDUVILLA LIGHTWEIGHT ROOFING TILES
FIXING
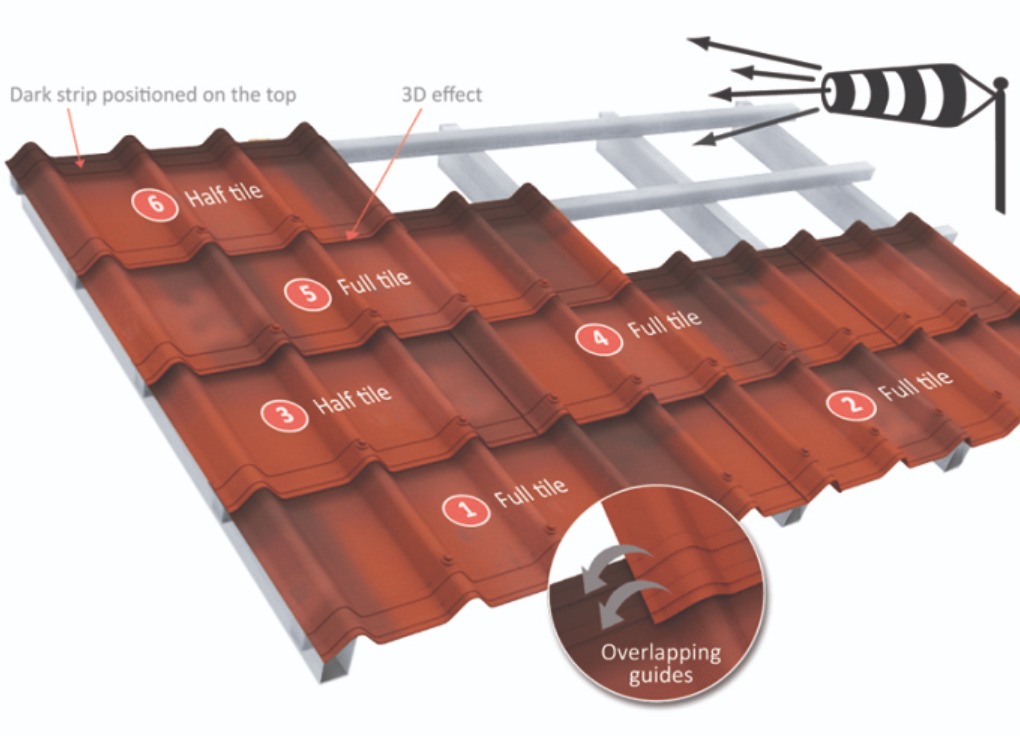
1. Start the installation in a direction opposite to the prevailing winds. Start the fixing from the eave.
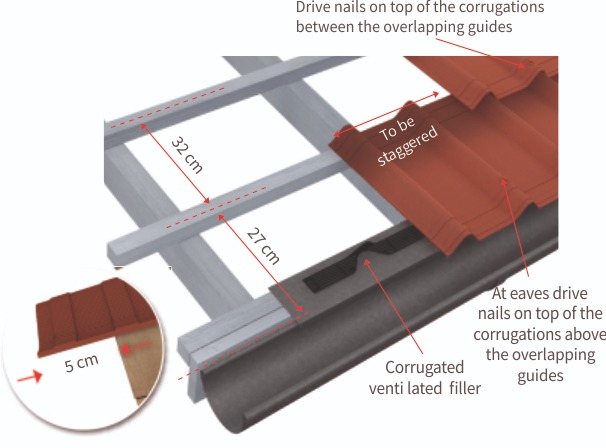
The overhang has to be max 5 cm.
Stagger the rows, by starting the second row with a half tile. Ensure proper waterproofing by aligning the overlapping guides.
To prevent the penetration of wind driven rain, snow and birds fix ONDUVILLA FOAM FILLERS.
2. Due to ONDUVILLA overhang, the distance between first and second purlin is 27 cm instead of 32 cm
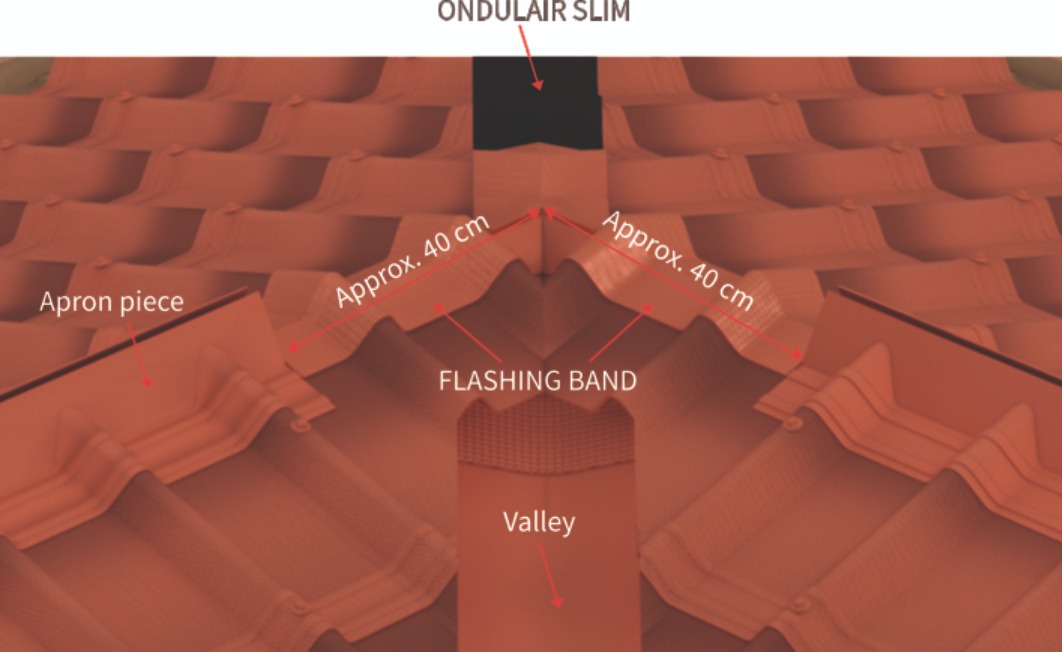
VALLEY
3. Position the valley and fasten it with standard nails. At the ridge point, cut the valleys and fix them with standard nails. The empty space will be used to glue the waterproofing solution.
RIDGE
4a. Cover the ridge line with standard ridge or slim cap and fasten to each side of the roof. The closure cap can be used to finish the end of ridge line if you are using slim cap.
4b. Ensure water proofing at ridge by applying the ONDUVILLA FOAM FILLERS, on both sides of the ridge line.
VERGE ELEMENT
5. The aesthetics and wind uplift protection can be optimized by using the verge element accessory, which is fixed first on the sidewall, then as well on the top of the corrugation.
WALL ABUTMENT
6. The ventilation gap between the wall and the apron piece should be secured with spacers that are applied at overlaps and in the middle of each apron piece.
Aluminium Z profile is then fixed to the wall, and a line of silicone mastic is necessary for the water tightness.
